Windows 10 Auto Login [Fast Steps]

If you want to be able to have easy access to your computer, using Windows 10 auto login is something that you shouldn’t escape at all! Especially in the case of a trusted and secure environment.
If you hate meeting those login prompts each time you try to start your device, auto login is the best thing that can happen at that moment! You won’t be disturbed by those agitating prompts anymore!
You can set up automatic login using two types of methods. So, let us discuss each of them in detail to Sign in automatically without a password in Windows 10.
Method 1: Setup Auto Login
1. Open the Run Command Window
Press and hold down the Windows key ⊞ and tap ‘R’ thereby releasing the Windows key to open the Run command window.
2. Type in netplwiz and Click ‘OK’
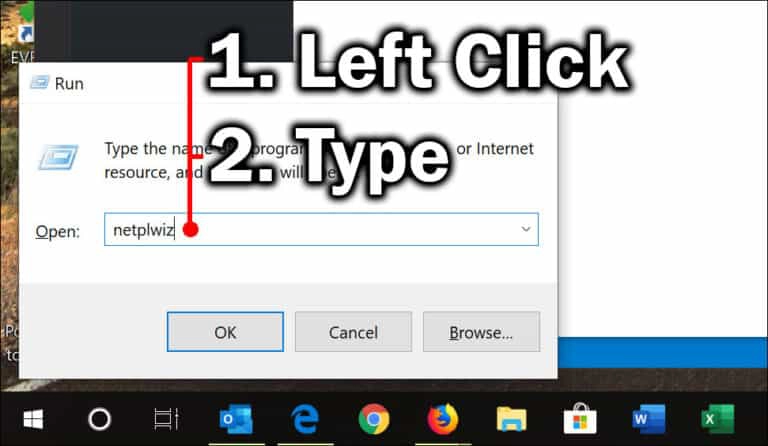
Next you are supposed to open user accounts using the run command. Just Left-click in the text box and choose ‘Open:’. Now, type in ‘netplwiz‘ (without quotes) and select the ‘OK’ option.
3. Uncheck Uncheck Users have to fill in a user name and password
You must enter your username and password if you are an Unchecked User. For that matter, you need to click the left button of the mouse that you see on the checkbox to uncheck it.
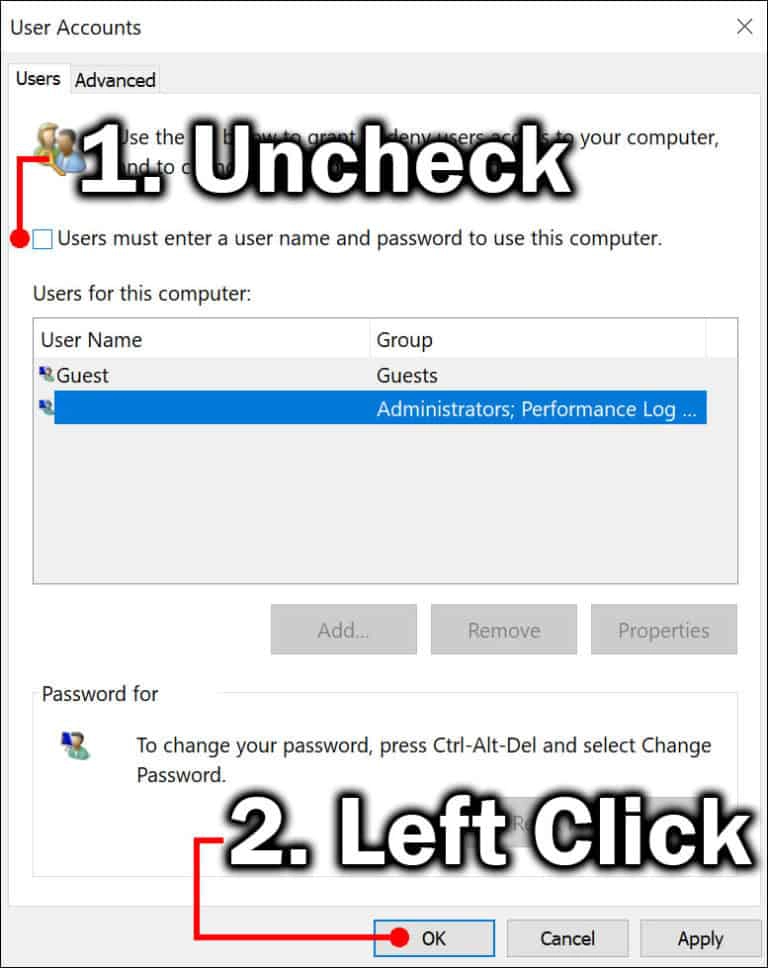
You will read a text: ‘Users must enter a user name and password to use this computer.’ (Refer to the image above)
In case it is already unchecked, you may once check it and then uncheck it.
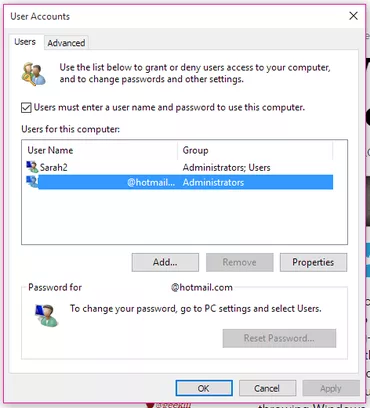
4. Fill in your login credentials
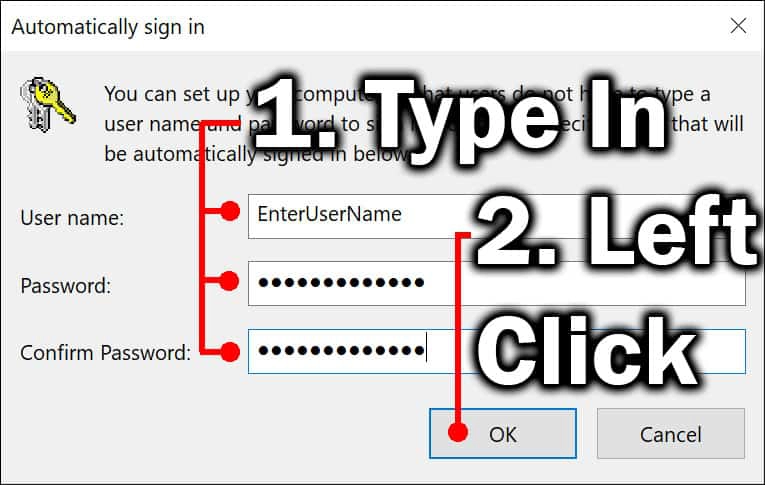
Once you have unchecked the checkbox you will see a new window popping up to your screen. It will ask you to log in with your username and password.
Fill in your username and password and click OK as shown in the image above.
Method 2: Windows 10 Auto Login using the Registry Editor
If you want to enable Windows 10 auto login differently, you may use the second method which is via using the registry editor.
As the name of this step suggest you are supposed to edit the registry. Make sure you have restored all your important pieces of information before making any type of Editing into the system.
1. Open the Registry Editor
First, you need to open regedit making use of the run command dialogue. Press and hold the Windows key of your keyboard and tap R thereby releasing the windows key to open the Run dialogue window.

Now, Left-click in the text box next to Open. Next, type in ‘Regedit’ (without quotes) and press OK.
You will see the registry editor opening.
2. Navigate to the Winlogon subkey
You may press the expansion markers (>) located below the navigation tree on the left side to open a couple of key branches.
HKEY_LOCAL_MACHINE \ SOFTWARE \ Microsoft \ Windows NT \ CurrentVersion
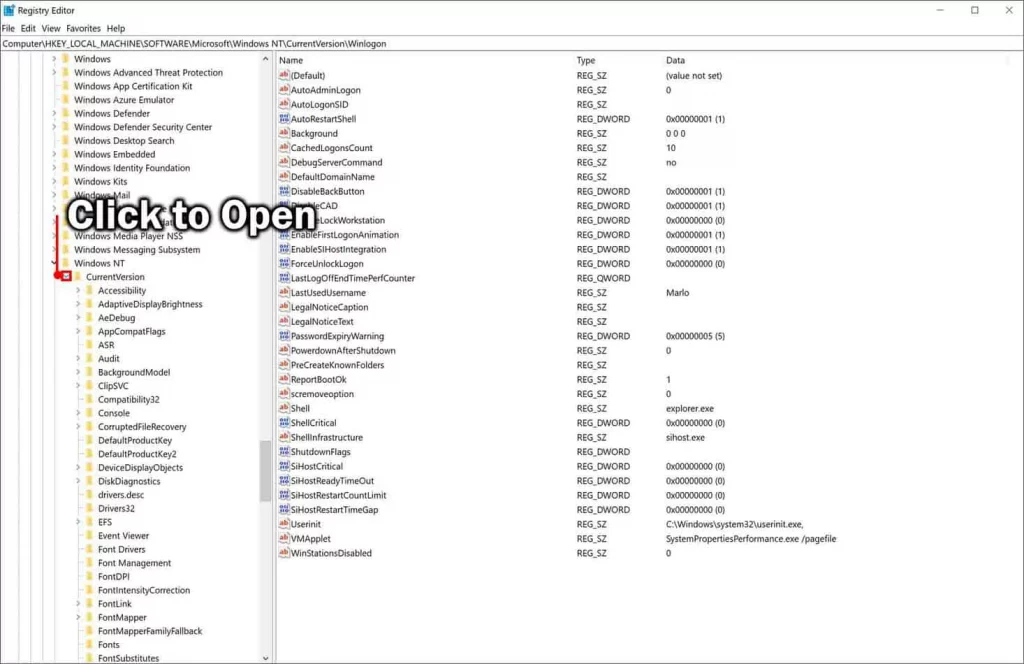
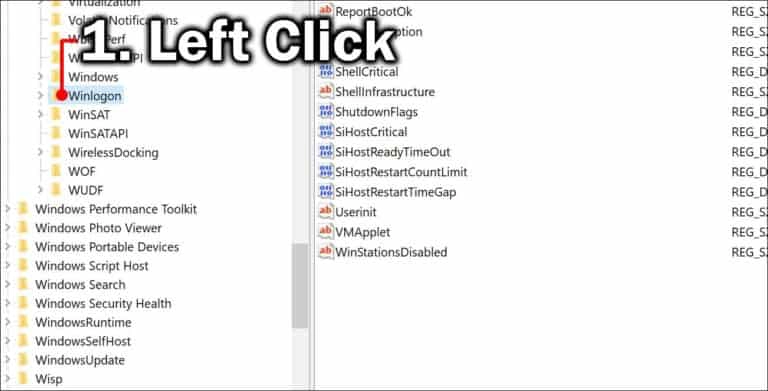
Next, click left on the winlogon key. The values will be displayed in the right pane.
3. Modify the Default user name and password keys
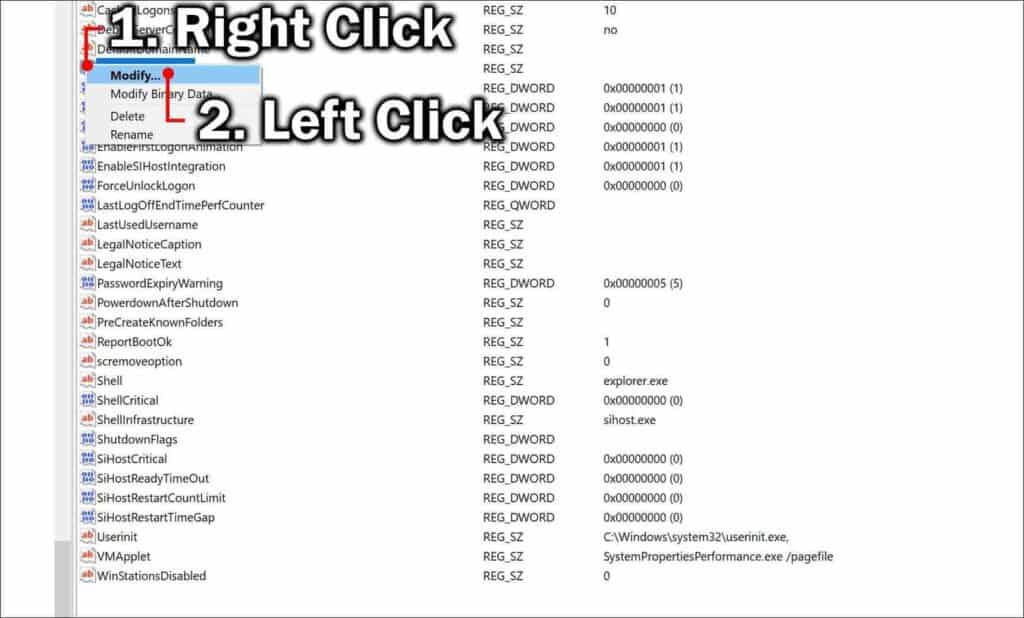
Press the right-click to select the default username. Go on and select Modify.
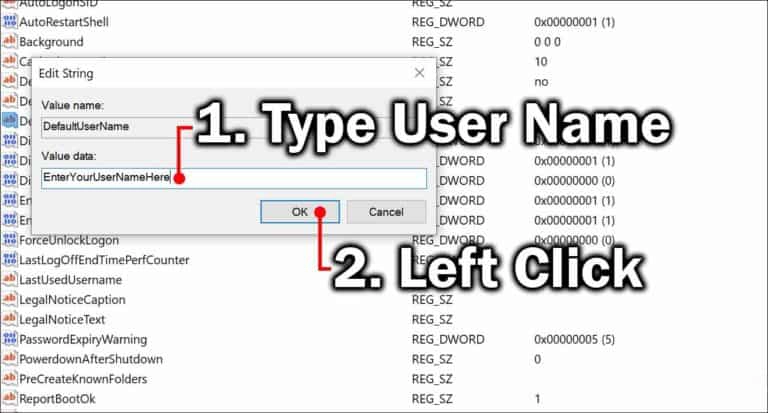
Fill in the username and edit the information that matches your user name. To save the modified data press OK.
What should I do if the default password value does not exist?
If the default password value does not exist you may create a fresh string value.
Fill in the default password value name. Next, select the Edit option from the menu.
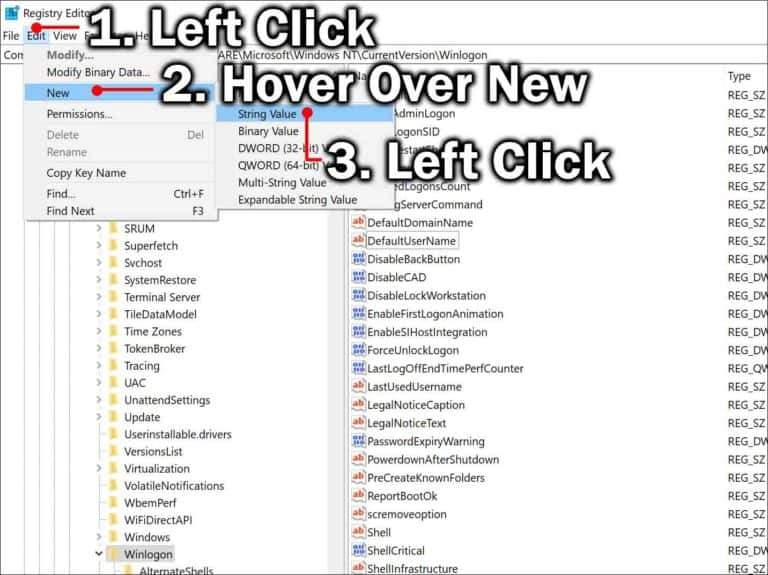
You will see a menu popping onto your screen. Circle the NEW option with the mouse pointer and select the String Value option.
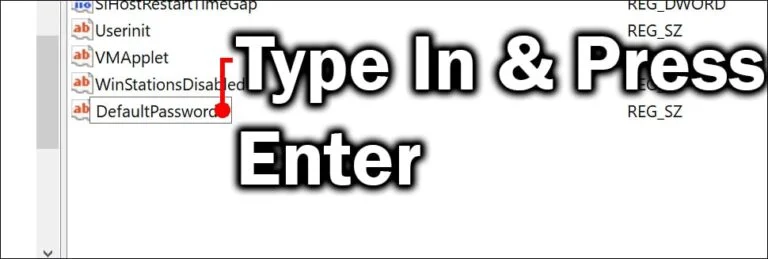
Enter the ‘DefaultPassword’ into the name box (without the quotes) and press the Enter key on your keyboard. (Refer to the image below)
You need to click right it Default Password. Select Modify option from the menu.
Enter your password in the Value Data text box and click the ‘OK’ option to save the modifications.
4. Create the AutoAdminLogon value if it’s missing
(1) Left Click on the Edit option in the menu at the top. Circle the NEW option with your mouse pointer and select String Value from the popping menu by left-clicking it.
(2) Enter your Auto Admin Login.
(3) Press Enter. Now right click on the Auto Admin Login. Select the Modify option to make edits to the data.
(4) Make sure that the value in the Value data box contains a 1. If there is any other number in place of 1, then replace it with 1. Now, select the Ok option.
Once you are done with this, shut down and restart your system.
If you see the Auto Login working its purpose well and good! Congratulations you have successfully enabled Windows10 auto login in your system.
Over to you…
However, always think twice before you enable Windows 10 auto login set up in your system. This setup is not going to provide you with the advanced security measures that a laptop requires.
The security measures depend on the type of work you do on your laptop. In case you require extra security features it might not be a good idea to install Windows 10 auto login.
Other than this, if you think the setup matches your situation and requirement go ahead and follow the above-mentioned steps to enable it.
![Why is my computer so slow all of a Sudden? [Instant Fixes]](https://expertratings.net/wp-content/uploads/2022/02/Why-is-my-computer-so-slow-Instant-Fixes-768x403.jpg)

![How to Fix Lenovo Laptop Screen Flickering? [Solved]](https://expertratings.net/wp-content/uploads/2021/12/Fix-Lenovo-Laptop-Screen-Flickering-768x433.jpg)

![Ethernet Slower than WiFi? [Easy Fixes for Wired Connection]](https://expertratings.net/wp-content/uploads/2021/10/Ethernet-Slower-than-WiFi-768x432.jpg)